
 My aunt was a serial hobbyist, and one of her hobby phases was macrame. Since she was always an avid gardener, many of her knotted creations were plant hangers. In fact, before she moved on to other hobbies, her kitchen looked like a suburban version of the hanging gardens of Babylon. She would have loved kokedama, an art that streamlines the plant display process by combining plant, container and hanger into a single unit.
Kokedama is a modern Japanese import. The name means “moss ball” in Japanese, and that pretty much defines this container-free method of growing small to medium-size houseplants. Instead of a pot or other vessel, plants grow in a soil mixture enclosed in sheet moss and held together by nylon filament or garden twine. The end result can be hung, or displayed on a decorative plate or tray. It is great for indoor gardeners, and can even be done with children, aided by a helpful adult.
Since weather has largely prevented outdoor garden work lately, I decided to try my hand at kodedama, which has been featured in all the shelter magazines. I will never be an “influencer”, but I do like to be on trend in all things horticultural.
Kodedama starts with a few necessary ingredients. These include: sheet moss, bonsai potting mix–which is available at some garden centers or online–all-purpose potting mix, and garden twine or nylon filament. The bonsai mix helps provide drainage. Have a pair of scissors close at hand, plus a large bowl. You may also want garden gloves.
Almost any small to mid-size plant will work. Make your choice based on personal preference and the amount of available light in the space where your finished kodedama will be displayed. If you plan to hang the plant, try ivy, asparagus fern, or philodendron. For a flowering ball, think about African violets, kalanchoe, or holiday cactus. Violas add an immediate touch of spring. Fancy-leaf begonias make showy kokedama. If you have sunny space and love succulents, smaller specimens will also do well.
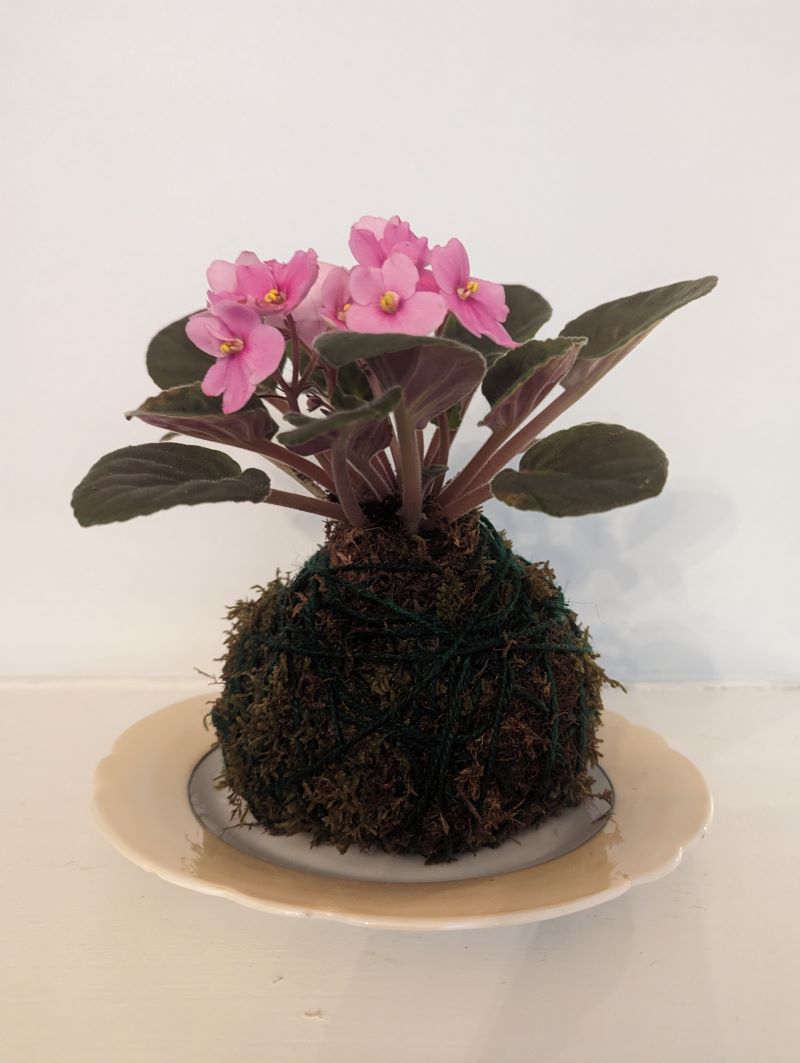
I chose to start with an inexpensive African violet in a four-inch nursery pot.
Kodedama tends to be messy, especially the first time. I was also born clumsy, so I covered the work area with a triple sheet of newsprint. Once you have covered vulnerable surfaces, assemble the chosen plant, plus all the ingredients, with a water source nearby. Your finished kodedama will probably be four to six inches wide, depending on the size of the plant.
Soak the sheet moss in water for a few minutes to make it pliable, and remove the plant from its container, shaking of any excess soil to ensure a compact root ball. Mix equal parts of the bonsai and potting mixes in the bowl. Start adding water, a little at a time, until the mixture holds together when scooped up in your palm. Form the mixture into a ball around the plant’s root ball, which feels a little like making a snowball with dirt. Pat and shape until the ball is cohesive.
Once the ball is secure, place it in the middle of the moistened piece of sheet moss and pull the sheet moss up around the ball, tucking it at the base of the plant. This part can be messy because you are dealing with damp soil and damp moss. Take the twine or filament and wrap it around the middle of the ball, leaving about six inches free to tie everything up at the end of the process. Wrap the twine around the moss/soil ball until the kokedama is held securely. If you are going to hang the finished creation, use the twine to make a hanging loop at the top of the ball. Cut the twine and tie the two ends in a knot. Trim the ends of the twine, or tuck them under. The kokedama is ready for prime time, and you will be ready to clean up the mess.
Even I, prone to mess-making, knew that I couldn’t just water a kokedama with a watering can, lest a drippy mess ensue. I hydrate mine by soaking the ball in a bowl of water for about five minutes and letting it drip dry for half an hour or so in a colander. Watering frequency may vary depending on the plant type and also the level of humidity in the air around it. If the ball feels relatively light and/or the leaves are droopy, the kokedama needs a drink. Dry winter air may mean watering every few days. Feed by using soluble fertilizer diluted according to manufacturer’s directions and added to the soaking water.
Eventually your kokedama will outgrow its mossy ‘container” When that happens, you can either use the same procedure to make a bigger kodedama, install it in an appropriately-sized container, or, in the case of a perennial plant, transfer it to the garden.
Not long ago I felt very smug when I saw a kokedama that was nearly identical to mine on sale for thirty-eight dollars in an upscale gardenalia store. I may have spent ten dollars to make mine, and I have leftover bonsai mix and moss for the next one. Pride is a sin, but saving money is a virtue. My kodedama and I are on the right side of the virtue ledger.